群暉的transmission套件的BT檔存放位置是 /usr/local/transmission/var/torrents
利用cp /usr/local/transmission/var/torrents 目的資料夾路徑,就可以將BT檔COPY到新資料夾備份
2014年10月20日 星期一
2013年8月17日 星期六
安裝VMware發生錯誤
安裝VMware發生如下錯誤
- vmwareworkstation_x64.msi failed
- Service VMware Authorization Service (VMAuthdService) failed to start. Verify that you have sufficient privileges to start system services
第二點
打開AVAST介面,在設定中的疑難排解關閉啟用硬體協助虛擬
第一點,請參照以下解法
Manually cleaning a Windows system
To manually remove the product from the Windows machine:
- Log into the Windows host operating system as the Local Administrator or a member of the Local Administrators group
- Windows XP and Vista: Microsoft article User accounts: frequently asked questions
- Windows 7: Microsoft article How do I log on as an administrator?
- Windows 8: Microsoft article How do I know I'm signed in as an administrator?
- Stop the VMware Services on the Windows host operating system:
- Open Start > Run, type
services.msc, and click OK. The Services Snap-in opens. - Right click the following service and select Stop.
- VMware Authorization Service
- VMware Authentication Service
- VMware Registration Service
- VMware DHCP Service
- VMware NAT Service
- VMware USB Arbitration Service
- VMware Workstation Server
- VMware WSX Service
- Uninstall the VMware network bridge adapter:
- Open the Network Connection options in the Windows host
- Windows XP: Click Start > Settings > Network and Dial-up Connections.
- Windows Vista, Windows 7 and Windows 2008 Server: Open Start > Run, type
ncpa.cpl, and click OK. The Network Connections Snap-in opens. - Windows 8 and Windows 2012 Server: Open Run (Where is the Run command?), type
ncpa.cpl, and click OK. The Network Connections Snap-in opens. - Right-click any network adapter icon and select Properties.
- Select VMware Bridge Protocol and click Uninstall.
- Uninstall all VMware devices:
- Right-click My Computer and select Manage.
- Click Device Manager.
- Choose Show hidden devices from the View menu.
- Double-click Network Adapters.
- Right-click each adapter whose name begins with VMware and select Uninstall.
- Delete folders on the Windows host containing files for the VMware product.
Notes:- For all folders, if you have installed only one VMware product, you can delete the entire VMware folder listed. If you have installed other products, such as VirtualCenter Client, delete only the relevant subfolders for the product you are trying to remove.
- On a GSX Server machine, remove the subfolders for VMware GSX Server, VMware Management Interface, VMware Scripting API, and either VMware Virtual Machine Console or VMware Remote Console.
- The program folder in which the VMware product was installed.
Note: If you have stored virtual machines in a folder under the program folder and want to save them, move them to a different folder before you delete the VMware program folder.
The default installation directory is:- 32-bit versions of Windows:
C:\Program Files\VMware\ - 64-bit versions of Windows:
C:\Program File (X86)\VMware\
- 32-bit versions of Windows:
- The application data folders.
The default locations are:- Windows XP:
C:\Documents and Settings\All Users\Application Data\VMware\C:\Documents and Settings\username\Application Data\VMware\
- Windows Vista/7/8/Server 2008:
C:\Users\username\AppData\Local\VMware\C:\Users\username\AppData\Roaming\VMware\
- Windows XP:
- The VMware program group folder from the start menu.
The default location is:- Windows XP:
C:\Documents and Settings\All Users\Start Menu\Programs\VMware\ - Windows Vista/7/8/Server 2008:
C:\ProgramData\Microsoft\Windows\Start Menu\Programs\VMware\
- Windows XP:
- Delete the VMware shortcut icons from the desktop.
- Delete these files:
Note: Your system may not have all of these files.C:\Windows\system32\vmnat.exeC:\Windows\system32\vmnetbridge.exeC:\Windows\system32\VMNetDHCP.exeC:\Windows\system32\vmnetdhcp.leasesC:\Windows\system32\vmxw2ksetup.dllC:\Windows\system32\vnetprobe.exeC:\Windows\system32\vnetprobelib.dllC:\Windows\system32\vnetinst.dllC:\Windows\system32\vnetlib.dllC:\Windows\system32\vnetlib.exeC:\Windows\system32\drivers\vmnet.sysC:\Windows\system32\drivers\vmnetx.sysC:\Windows\system32\drivers\VMparport.sysC:\Windows\system32\drivers\vmx86.sysC:\Windows\system32\drivers\vmnetadapter.sysC:\Windows\system32\drivers\vmnetbridge.sysC:\Windows\system32\drivers\vmnetuserif.sysC:\Windows\system32\drivers\hcmon.sysC:\Windows\system32\drivers\vmusb.sys
- Delete the
__vmware_user__local user and the__vmware__local group from the Windows system, if they exist. - Remove these registry keys for the VMware Product on the Windows Host. Refer to the list below for the product which you are removing.
Note: Before making any registry modifications, ensure that you have a current and valid backup of the registry and the virtual machine. For more information on backing up and restoring the registry, see the Microsoft article 136393.- Workstation 4.5/5.0/5.5
HKEY_CLASSES_ROOT\Installer\Features\317A1D89C83432A4A86B143BC7A4D274HKEY_CLASSES_ROOT\Installer\Products\317A1D89C83432A4A86B143BC7A4D274HKEY_LOCAL_MACHINE\SOFTWARE\Classes\Installer\Features\317A1D89C83432A4A86B143BC7A4D274HKEY_LOCAL_MACHINE\SOFTWARE\Classes\Installer\Products\317A1D89C83432A4A86B143BC7A4D274HKEY_LOCAL_MACHINE\SOFTWARE\Microsoft\Windows\CurrentVersion\Installer\UserData\S-1-5-18\317A1D89C83432A4A86B143BC7A4D274HKEY_LOCAL_MACHINE\SOFTWARE\Microsoft\Windows\CurrentVersion\Uninstall\{98D1A713-438C-4A23-8AB6-41B37C4A2D47}HKEY_LOCAL_MACHINE\SOFTWARE\VMware, Inc.
- Workstation 6.x/7.x
HKEY_CLASSES_ROOT\Installer\Features\2BC5FF3A53BF85647815E9EDD1563BAAHKEY_CLASSES_ROOT\Installer\Products\2BC5FF3A53BF85647815E9EDD1563BAAHKEY_LOCAL_MACHINE\SOFTWARE\Classes\Installer\Features\2BC5FF3A53BF85647815E9EDD1563BAAHKEY_LOCAL_MACHINE\SOFTWARE\Classes\Installer\Products\2BC5FF3A53BF85647815E9EDD1563BAAHKEY_CLASSES_ROOT\Installer\Products\7A26F0EA2A1AF704F9C48439B99DDAD8HKEY_CLASSES_ROOT\Installer\Products\7A79579133DA8984D9E8376086814B46HKEY_CLASSES_ROOT\Installer\UpgradeCodes\3F935F414A4C79542AD9C8D157A3CC39HKEY_LOCAL_MACHINE\SOFTWARE\Microsoft\Windows\CurrentVersion\Installer\UserData\S-1-5-18\2BC5FF3A53BF85647815E9EDD1563BAAHKEY_LOCAL_MACHINE\SOFTWARE\Microsoft\Windows\CurrentVersion\Uninstall\{A3FF5CB2-FB35-4658-8751-9EDE1D65B3AA}HKEY_LOCAL_MACHINE\SOFTWARE\VMware, Inc.
- Workstation 8.x/9.x
HKEY_CLASSES_ROOT\Installer\Features\A57F49D06AE015943BFA1B54AFE9506CHKEY_CLASSES_ROOT\Installer\Products\A57F49D06AE015943BFA1B54AFE9506CHKEY_CLASSES_ROOT\Installer\UpgradeCodes\3F935F414A4C79542AD9C8D157A3CC39HKEY_LOCAL_MACHINE\SOFTWARE\Microsoft\Windows\CurrentVersion\Uninstall\{0D94F75A-0EA6-4951-B3AF-B145FA9E05C6}HKEY_LOCAL_MACHINE\SOFTWARE\Wow6432Node\VMware, Inc.\VMware WorkstationHKEY_LOCAL_MACHINE\SOFTWARE\Wow6432Node\VMware, Inc.\Installer\VMware WorkstationHKEY_LOCAL_MACHINE\SOFTWARE\Classes\Applications\vmware.exe
- VMware Player 2.x/3.x/4.x/5.x
HKEY_CLASSES_ROOT\Installer\Features\AE11A35A5900F39468AF1AE5A8684A50HKEY_CLASSES_ROOT\Installer\Products\AE11A35A5900F39468AF1AE5A8684A50HKEY_LOCAL_MACHINE\SOFTWARE\Classes\Installer\Features\AE11A35A5900F39468AF1AE5A8684A50HKEY_LOCAL_MACHINE\SOFTWARE\Classes\Installer\Products\AE11A35A5900F39468AF1AE5A8684A50HKEY_CLASSES_ROOT\Installer\Products\7A26F0EA2A1AF704F9C48439B99DDAD8HKEY_CLASSES_ROOT\Installer\Products\7A79579133DA8984D9E8376086814B46HKEY_LOCAL_MACHINE\SOFTWARE\Microsoft\Windows\CurrentVersion\Installer\UserData\S-1-5-18\AE11A35A5900F39468AF1AE5A8684A50HKEY_LOCAL_MACHINE\SOFTWARE\Microsoft\Windows\CurrentVersion\Uninstall\{A53A11EA-0095-493F-86FA-A15E8A86A405}HKEY_LOCAL_MACHINE\SOFTWARE\Classes\Installer\UpgradeCodes\3F935F414A4C79542AD9C8D157A3CC39HKEY_LOCAL_MACHINE\SOFTWARE\VMware, Inc.
- ACE Manager 1.0.1
HKEY_CLASSES_ROOT\Installer\Features\BC5E922F5258EE74BAC9B3AA1D6E0B1BHKEY_CLASSES_ROOT\Installer\Products\BC5E922F5258EE74BAC9B3AA1D6E0B1BHKEY_LOCAL_MACHINE\SOFTWARE\Classes\Installer\Features\BC5E922F5258EE74BAC9B3AA1D6E0B1BHKEY_LOCAL_MACHINE\SOFTWARE\Classes\Installer\Products\BC5E922F5258EE74BAC9B3AA1D6E0B1BHKEY_LOCAL_MACHINE\SOFTWARE\Microsoft\Windows\CurrentVersion\Installer\UserData\S-1-5-18\BC5E922F5258EE74BAC9B3AA1D6E0B1BHKEY_LOCAL_MACHINE\SOFTWARE\Microsoft\Windows\CurrentVersion\Uninstall\{F229E5CB-8525-47EE-AB9C-3BAAD1E6B0B1}HKEY_LOCAL_MACHINE\SOFTWARE\VMware, Inc.
- ACE Player 1.0
HKEY_CLASSES_ROOT\Installer\Features\2C06509C057477E4FBEAC7E383CDFF3DHKEY_CLASSES_ROOT\Installer\Products\2C06509C057477E4FBEAC7E383CDFF3DHKEY_LOCAL_MACHINE\SOFTWARE\Classes\Installer\Features\2C06509C057477E4FBEAC7E383CDFF3DHKEY_LOCAL_MACHINE\SOFTWARE\Classes\Installer\Products\2C06509C057477E4FBEAC7E383CDFF3DHKEY_LOCAL_MACHINE\SOFTWARE\Microsoft\Windows\CurrentVersion\Installer\UserData\S-1-5-18\2C06509C057477E4FBEAC7E383CDFF3DHKEY_LOCAL_MACHINE\SOFTWARE\Microsoft\Windows\CurrentVersion\Uninstall\{C90560C2-4750-4E77-BFAE-7C3E38DCFFD3}HKEY_LOCAL_MACHINE\SOFTWARE\VMware, Inc.
- Workstation 4.5/5.0/5.5
- Reboot the Windows host system.
For more information, see:
2012年12月5日 星期三
2010年6月16日 星期三
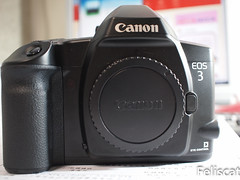
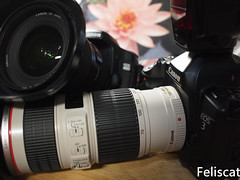
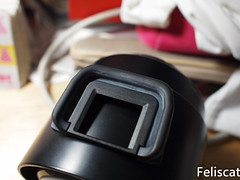
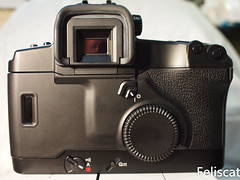
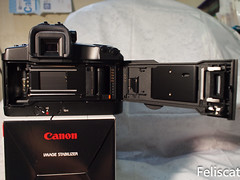
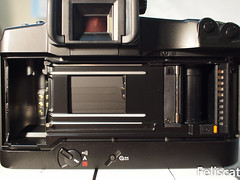
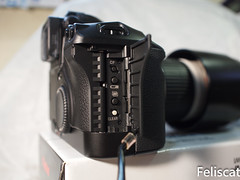
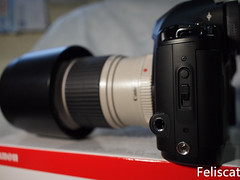
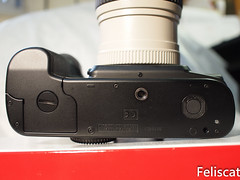
Canon EOS 3
上週標到的EOS 3,第八天就收到貨了,算挺快的。
端午節的前一天,公司櫃台小妹在電梯門口遞給我這個包裹
看起來像是給小朋友的玩具
打開看看吧
看起來是相機
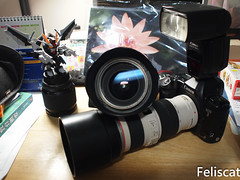
原來是上週標到的EOS 3!!!
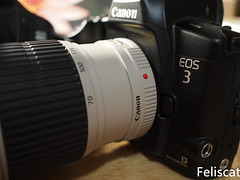
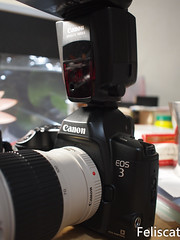
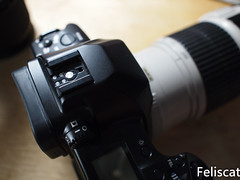
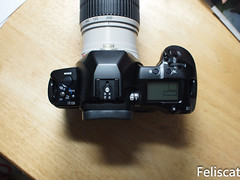
裝上小小白Is和580exii~
外靴看起來少用
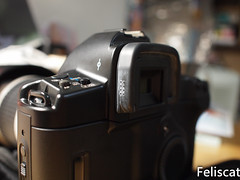
眼罩有點白化,正常現像
機背
乾淨的底片室
PC端子和遙控插座
a quickr pickr post
2010年6月4日 星期五
波斯王子-時之刃
昨晚一個人去國賓看波斯王子 時之刃,六點去買票以為已經沒有中間的座位。
不過還是和售票員說給我中間的位置,售票員給我一張15排1號的票。
心裡想大概又是邊邊的位置...
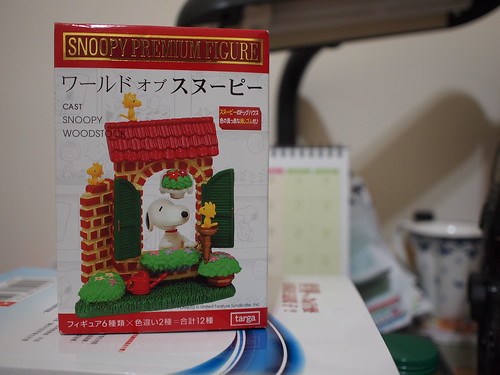
距離開演還有一小時,所以去萬年逛逛,順便吃點東西,結果看到SNOOPY的盒玩。
想想似乎還欠某個人禮物,所以就買一盒,那個某人看到記得找我領取啊~
買完後,也該進場了,沒想到進場後居然是正中央的位置!!!
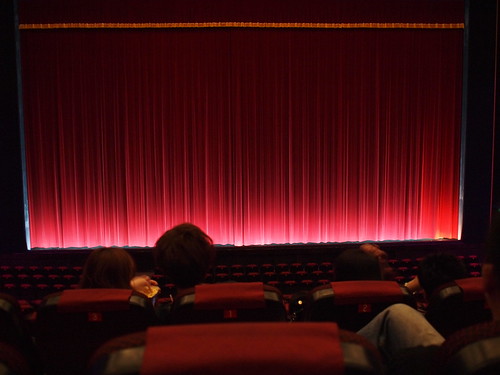
真是爽啊!!!晚上七點這場大約百人左右,只佔了全部的1/10而已。
從波斯王子-時之沙、武者之心一直玩到王者無雙,聽到要改編成電影就很期待。
開演後,遊戲中的元素也都有在影片中重現。
例如遊戲中王子的飛簷走壁、副武器、翻牆、翻單槓、飛刀等。
不過不過遊戲中的怪物是時之沙所變化而成的,到了電影大概則被改掉。
就電玩迷的角度來說,此部電影 改編得很成功,值得一看。
至於沒玩過電玩,這也是一部不錯的動作片。
女主角Gemma Arterton也是吸引我去看的因素之一。
我是從顫慄異次元發現Gemma Arterton的魅力,沒想到資料一查,原來她也演過007量子危機。
初期那位女祕書就是Gemma Arterton,相信不少人對她的好身材應該印象深刻。
在顫慄異次元,當然也不少冰淇淋可以吃~
因此為了Gemma Arterton和成功改編的波斯王子,等藍光出來決定買一片支持一下XD
不過還是和售票員說給我中間的位置,售票員給我一張15排1號的票。
心裡想大概又是邊邊的位置...
距離開演還有一小時,所以去萬年逛逛,順便吃點東西,結果看到SNOOPY的盒玩。
想想似乎還欠某個人禮物,所以就買一盒,那個某人看到記得找我領取啊~
買完後,也該進場了,沒想到進場後居然是正中央的位置!!!
真是爽啊!!!晚上七點這場大約百人左右,只佔了全部的1/10而已。
從波斯王子-時之沙、武者之心一直玩到王者無雙,聽到要改編成電影就很期待。
開演後,遊戲中的元素也都有在影片中重現。
例如遊戲中王子的飛簷走壁、副武器、翻牆、翻單槓、飛刀等。
不過不過遊戲中的怪物是時之沙所變化而成的,到了電影大概則被改掉。
就電玩迷的角度來說,此部電影 改編得很成功,值得一看。
至於沒玩過電玩,這也是一部不錯的動作片。
女主角Gemma Arterton也是吸引我去看的因素之一。
我是從顫慄異次元發現Gemma Arterton的魅力,沒想到資料一查,原來她也演過007量子危機。
初期那位女祕書就是Gemma Arterton,相信不少人對她的好身材應該印象深刻。
在顫慄異次元,當然也不少冰淇淋可以吃~
因此為了Gemma Arterton和成功改編的波斯王子,等藍光出來決定買一片支持一下XD
2010年5月21日 星期五
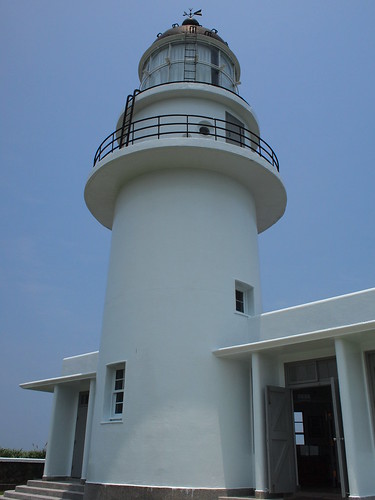
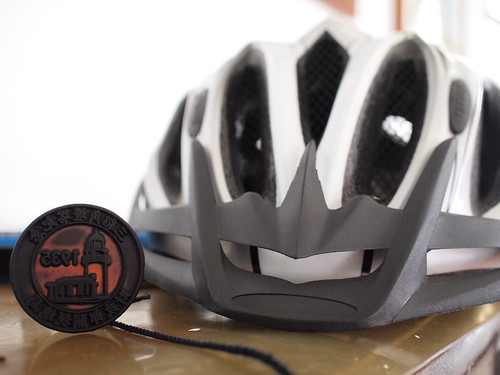
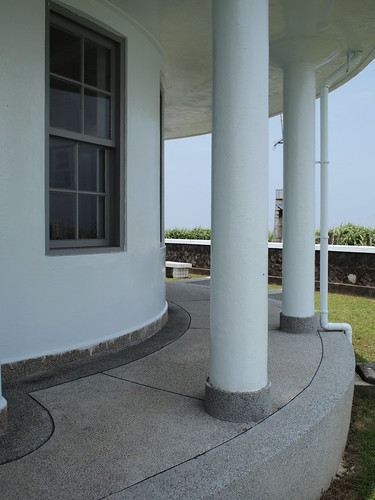
破百之三貂角燈塔
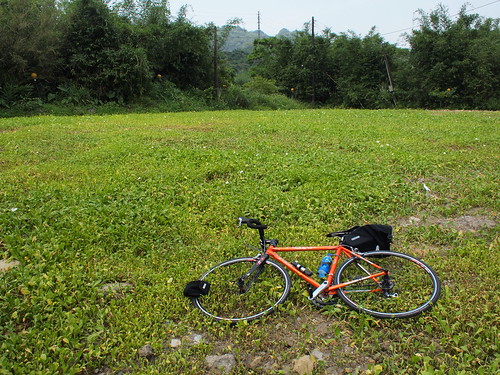
原本是規劃200K的路程,不過回到家已經8點了,只好改成雙塔。
然而計畫總是趕不上變化,低估了太陽的威力加上準備不足,抵達第一塔已經消耗太多體力。
還好車的性能還不錯,頂著有點餓的肚子回家,原本預計要晚上六點才到,結果五點半就抵達家門。
下次打算五點出發!!!
P.S.雖然夏天太陽很大很討厭,不過當天晚上一到師大夜市,還是不得不說夏天真棒
現在女孩脾氣不好的還真不少哩~

然而計畫總是趕不上變化,低估了太陽的威力加上準備不足,抵達第一塔已經消耗太多體力。
還好車的性能還不錯,頂著有點餓的肚子回家,原本預計要晚上六點才到,結果五點半就抵達家門。
下次打算五點出發!!!
P.S.雖然夏天太陽很大很討厭,不過當天晚上一到師大夜市,還是不得不說夏天真棒
現在女孩脾氣不好的還真不少哩~
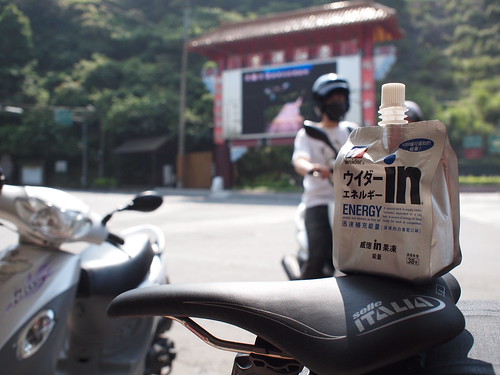
9點從石碇出發,沒帶什麼吃的,到石碇交流道的7-11買兩包能量果凍。
即使非假日,還是有年輕人跑到東北角玩。
即使非假日,還是有年輕人跑到東北角玩。
經過這個路口特別停下來拍照,整片草原上都是白色的蝴蝶,可惜技巧不夠,無法表現出來現場的感覺。
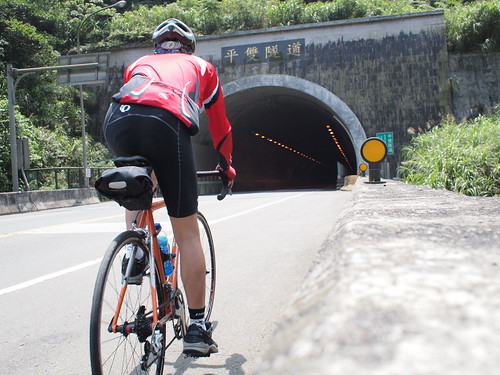
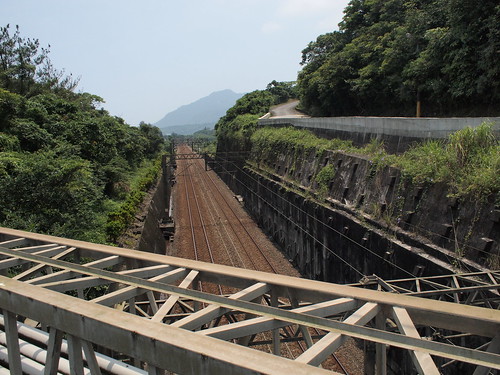
1349M的平雙隧道
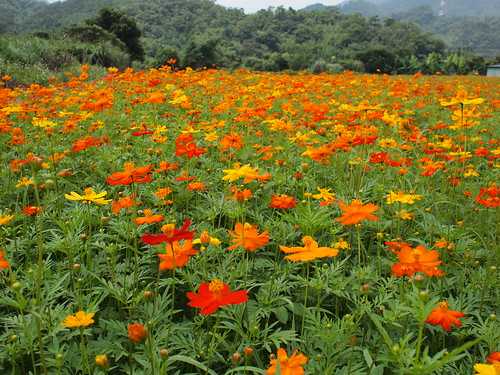
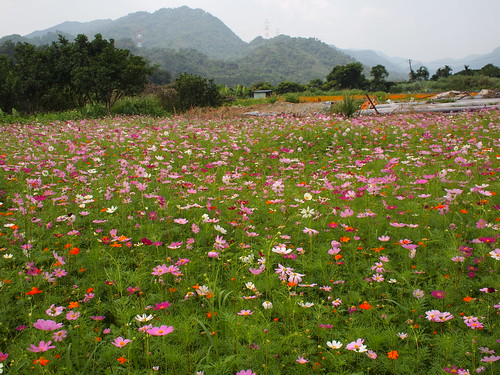
10點30分抵達雙溪,看見盛開的波斯菊
真想跳下去搭火車~
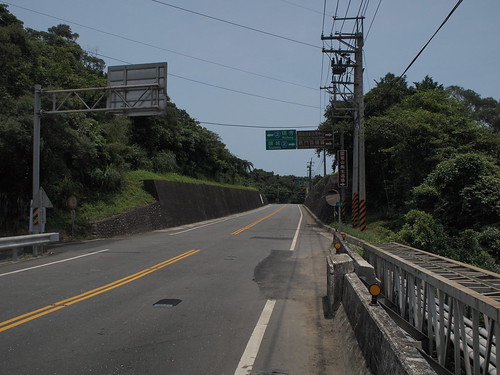
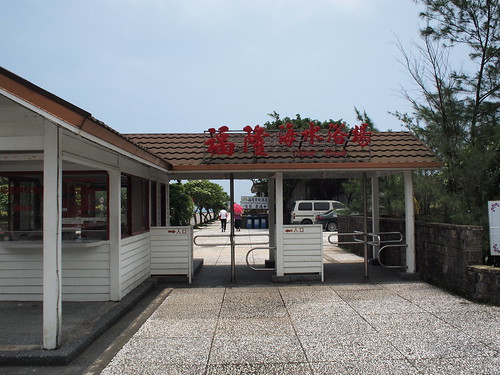
福隆往右
本想進去看一下完工七成的沙雕展,結果要門票,全票要90!!!
到這邊已經有點累,加上補給品都吃完,肚子有點餓,連騎上來的坡都走了幾十公尺。
看來是吃得不夠多在加上這兩天有點拉肚子的現象,還好不是很嚴重,休息半小時開始回程。
騎這麼久,這還是第二次用牽車的,補給品的準備很重要!!
大太陽下騎車還是要盡量避免,消耗不少體力,還好已經察覺身體狀況,避免中暑!!
看來是吃得不夠多在加上這兩天有點拉肚子的現象,還好不是很嚴重,休息半小時開始回程。
騎這麼久,這還是第二次用牽車的,補給品的準備很重要!!
大太陽下騎車還是要盡量避免,消耗不少體力,還好已經察覺身體狀況,避免中暑!!
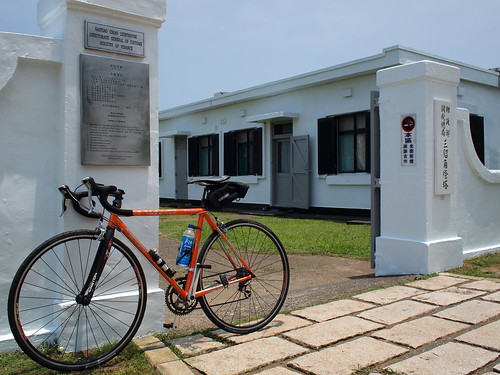
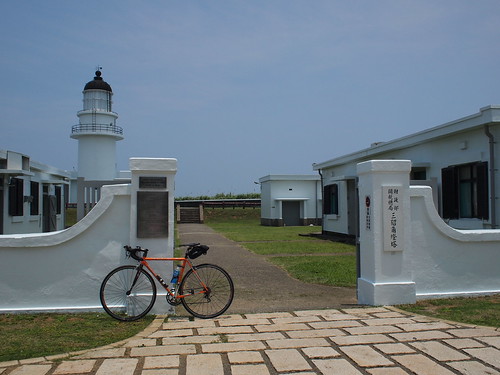
燈塔入口
12點,終於到了目的地!!!
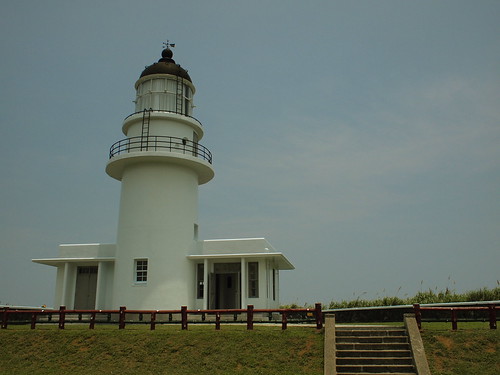
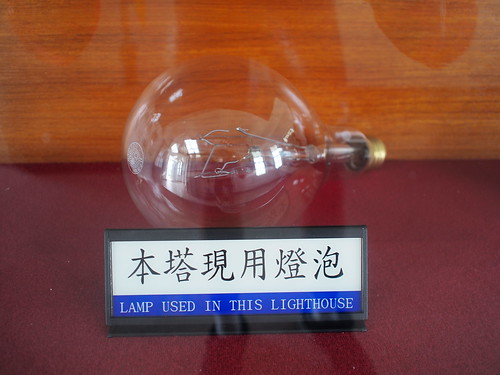
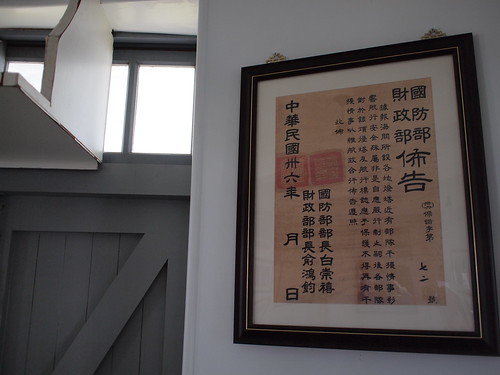
唯一有開放參觀的燈塔
要不是趕路,真想在這邊躺下來睡個覺
12點30分,離開前再來一張
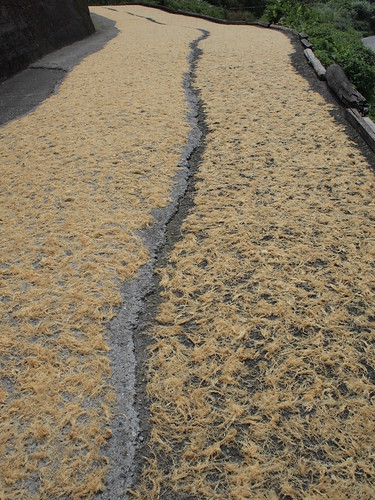
曝曬後,已經褪色的石花菜
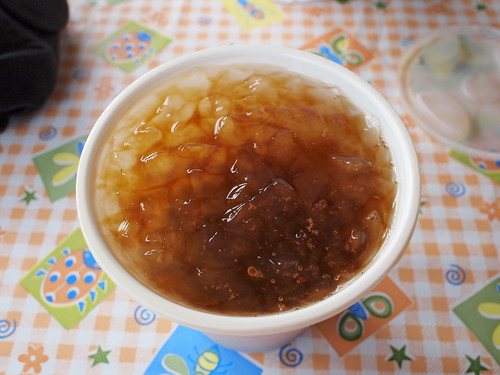
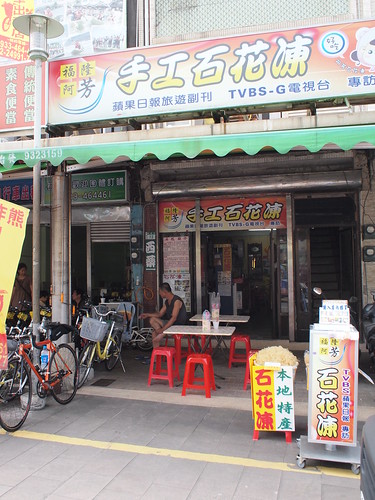
下午2點,感謝我的Gps 60csx介紹我這家好吃的黑糖石花凍,去冰沒有冰塊的哦!!
a quickr pickr post
2010年5月4日 星期二
主機更新
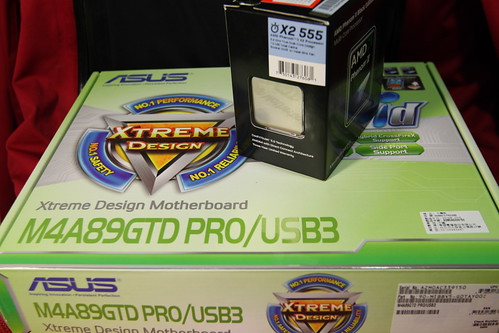
主機板出了點小問題,順便升級一下不夠用的CPU...
POWER部份還是選擇這十年來使用的ZIPPY,只不過似乎都沒有低瓦數的選擇,只好選560W...
CPU原本想換I7,不過INTEL實在太貴了,因此只好重回AMD的懷抱,改用雙核X2 555黑盒版
反正BIOS調一下,不用幾秒鐘就可以變四核,何必多花那幾千元買INTEL,CPU貴、主機板也貴...
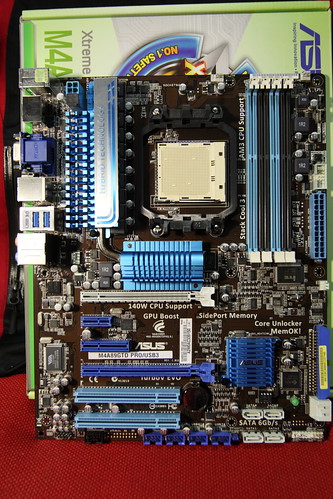
主機板就買合板,萬一顯示卡掛了,還有內建的可以撐一下
雖然是合板,不過支援SATA 6GB和USB 3.0,價格也不便宜,內建的顯示卡也是目前合板中效能最好的
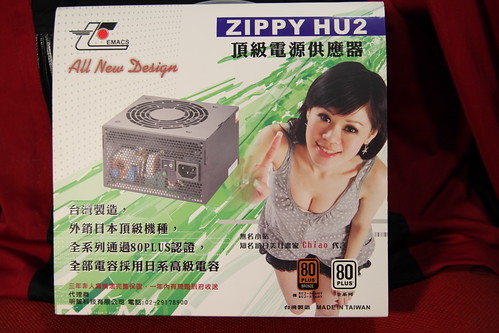
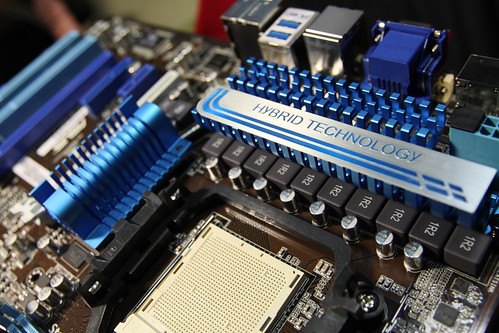
POWER部份還是選擇這十年來使用的ZIPPY,只不過似乎都沒有低瓦數的選擇,只好選560W...
CPU原本想換I7,不過INTEL實在太貴了,因此只好重回AMD的懷抱,改用雙核X2 555黑盒版
反正BIOS調一下,不用幾秒鐘就可以變四核,何必多花那幾千元買INTEL,CPU貴、主機板也貴...
主機板就買合板,萬一顯示卡掛了,還有內建的可以撐一下
雖然是合板,不過支援SATA 6GB和USB 3.0,價格也不便宜,內建的顯示卡也是目前合板中效能最好的
初次拿到這顆Power的感想,重量就像封面一樣有份量...
Cpu:雙核 X5 555 黑盒版
主機板:Asus m4a89gtd pro/Usb3
主機板:Asus m4a89gtd pro/Usb3
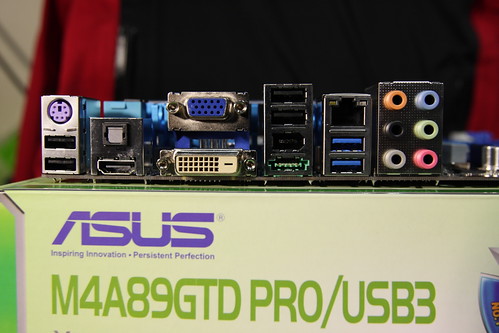
內建顯示卡,支援Hdmi、Dvi、Vga輸出,Power esata、Usb 3.0介面
我喜歡的藍色散熱片,看了真愉快~
a quickr pickr post
訂閱:
文章 (Atom)
-
上周從AU購入我的第一台底片機,基本上這台底片機是打算用來製作一些有趣的小玩意。 底片機何其多,為何選Contax 167MT? 因為手上有四個Contax Zeiss鏡頭,首選當然是Contax機身,為何是167MT,這是最便宜的一台。 含盒、保單、說明書和機身150AUD,算...
-
情書工具,不過貓的火漆章品質稍差一點。 打算直接跟英國下單,在添購幾個,比誠品和網拍便宜多了。 左邊是限量08年萬寶龍情書墨水,不過味道散太快了.... 右邊是Jansen手工的紫羅蘭香味墨水。 洋蔥紙 手工筆袋 Lamy 1.1藝術筆尖,Lamy Sa...
-
上週同事的環保筷弄丟,剛好去年有看到《筷中極品環保筷伸縮筷》,這雙筷子還榮獲2008國家發明創作獎。 趁這時候一起團購撿點便宜,收到後比想像中的好,不鏽鋼清潔殺菌也容易,整雙丟進熱水就好了。 連原本不打算買得同事,看到實品後,也一次買十雙送親朋友。 總統實在應該頒個十大傑出青年獎...


